Showing posts with label DIY coffered ceiling. Show all posts

Monday, December 23, 2013

The final and finished family room reveal

 We have finally moved back into the family room and we are loving it. I took a vote and everyone agrees the ceiling is the best part of the room followed by the floors.
I found a nice sisal 8x10 rug at Home Depot for $150 which was amazing, its synthetic because I have a family and pets and real sisal would not stand up to them.
 I moved the grey ektorp arm chair into the family room and we decided to leave the settee out of the room to keep it more open, we did lose seating for one but hopefully we will get that new longer sofa and we will gain back that lost seating. The room this way feels so much better now and all dressed for Christmas its lovely. You may notice I also changed out the lamps, I decided to try the dining room lamps and I love them with the burlap shades.
 Here is a good look at the floors I am so happy to have wood throughout this space now.
 I am so looking forward to my new coffee table, my hubby ordered it for me after returning that chair I mentioned earlier. Turns out another husband wanted it for his wife in time for Christmas and if we hadn't wanted it then he wouldn't have had it for her in time, so I think it was meant to be really.


So there it is as it is now, I will do a new post after Christmas with my new coffee table.
Merry Christmas...
here's a couple of before's for fun

Tuesday, December 17, 2013

unwrapping an early Christmas gift...

 I completed three coats of water base Varathane last night and thought it was about time to remove the plastic door and when I did and stood back in the kitchen to take it all in I must admit I was in awe of how beautiful it looked. If I may say so. After all it now looks like all those gorgeous Pinterest images I have been longing for for so long. Having the same deep rich flooring really expands and blends the space so much better. I just need to finish the quarter round and then wait a couple more days for the top coat to fully cure, luckily it is a three day cure water based Varathane then we will move some furniture back in. 
My opinion on decorating is that a room should always look beautiful empty, if you start with beautiful bones and character the less fluff you have to add and the easier decorating the room is. As well this is what adds value to your home, decor is nice and cute but it isn't there to stay like millwork. 

This project took me 16 days to complete which is a little bit shorter than the 21 day timeline that I wasn't sure I could even make. Now it did take me much of each day from 4-6 hours some days on average, I know 4 hours doesn't sound long , but working over head and on your knees for 4 hours is rough. I took two whole days off through the process I was on a mission. 


I am so happy to have that carpet gone, it was less than two years old and showing so much matting and crushing , under the sofa looked great but the rest was so shabby looking. 
Having a continuous flooring also means I can extend my table even into the family room a bit for large gatherings which will be a great option.
I have been looking for a nice rug for the family room, I mean I hate to cover the wood but the room needs an 8x10 area carpet.
If we didn't put in a rug the furniture legs would ruin the pine floors and the furniture would slide around which would be an incredible pain, plus it's just nice visually and functionally.
 I think I am going with a synthetic sisal carpet for now because of the price and wear and tear. I love real sisal but one dog barf incident and its ruined. I would love a more decorative option but we also need a new sofa so the sofa will come first as we can always upgrade our rug. As well I haven't found anything I love yet.

We are thinking the Ikea Hovas sofa would be the perfect choice for our big reveal... 

 I am happy to share I found some almost perfect wool 8x10 rugs for around $500 price at Home Depot which I think it pretty great but I still need to check out Homesense on a regular basis I suppose.
Life is about to get back to normal and Christmas is about to officially begin at our house. Happy holiday's!
If you would like to see how I DIY my coffered ceiling check it out here http://chriskauffman.blogspot.ca/2013/12/my-diy-coffered-ceiling.html

Wednesday, December 11, 2013

My DIY coffered ceiling


I thought I should give a little run down in one place as to how I completed my coffered ceiling project just in case you want to try this project.


 Here is how it looked on day one, just fine a smooth ceiling but we wanted a beautiful ceiling.
 We then decided on our placement and found the ceiling joists and screwed the 2x4's to the studs, then added blocking to the studs , 2 blocks 5 at each connection and randomly along the lengths to attach the MDF boards. I had Home Depot rip down 3 sheets of 5/8" MDF into 5.5" strips.
I then used a 2x4 to set my table saw to cut the strips of MDF for the bottom pieces approx 3.5" wide.

 You can see how I attached the MDF to the studs, I used my nail gun for this part.
 We installed a plastic zippered door to keep the mess better contained.
 There was such a mess caused by all the priming and sanding and priming and more sanding.

 Then I added crown moulding and caulked all the seams and filled all the nail holes and then did between 2-3 coats of satin latex paint in Behr's Vermont Cream.


I used this new gadget from Lowe's to help me with the crown moulding, it just keep the crown moulding at the proper angle when you cut it upside down. 

I also used this scaffolding and it was the most important piece of equipment to completing this project. It will also be a great item to have for other projects like crown moulding and painting, I didn't even know it existed until just before we started the project , I am so grateful my Mom's husband pointed it out to me.
 http://www.homedepot.ca/product/metaltech-steel-folding-scaffold-work-platform-500-lbs/938855

So if you have ever longed for a coffered ceiling like I have for years then maybe it is something you can do also. It is not a difficult project but it does take time and patience and have a helper for the initial stud placement is necessary but the rest I was able to manage on my own, I may have had to hold my nail gun in between my knees while I positioned the 8ft pieces of MDF but a girl's gotta do what a girls gotta do.

If you try this project please let me know I would love to see.

Wednesday, December 4, 2013

Coffered ceiling update day 3 and 4

 Things are moving smoothly so far. I was able to install all of the remaining side pieces to the studs yesterday. If we had not bought scaffolding than it wouldn't have been possible to do this part solo.
 There is so much priming then sanding then priming and more sanding...this is time consuming.
So glad we put up the plastic door, because this project is a huge mess maker, there is so much fine dust.
 So this project is pretty simple and straight forward. Just choose your placement , find your joists and attach 2x4's add double blocking , cut MDF prime and sand it (just one side and one end) nail those strips of MDF around the room at the ceiling and then sandwich them on either side of the 2x4's and then add a strip the same size as the 2x4 to the bottom of the blocking and then trim each box with crown moulding and then make sure all nail holes are filled and sanded also sand any imperfections and then caulk all the seams , easy right? then paint and paint and paint, get lots of massages you'll need them. This is a tough project on the back.
Here is how it looks as of 9:00 am today. I am going to get the rest of the bottom pieces in and then I am off to select a crown moulding.
I should really go get to work if I am going to get this done in time for Christmas....bye for now.

Saturday, November 30, 2013

Coffered ceiling update day one and two...things are already taking shape

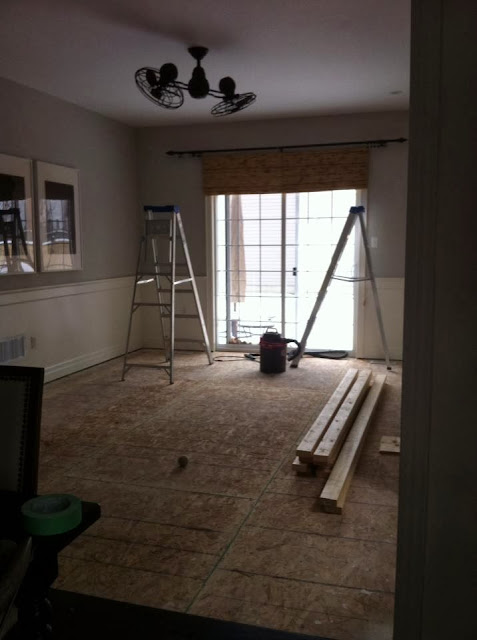
I spent most of Friday moving furniture out of the family room, it sure is nice to have big kids who can help move heavy things like sofa's, girls rock...when Daddy is working late. I ripped out the carpet under padding and tack strips and headed off to the dump all before dinner. Bright and early Saturday morning Todd and I were planning to get started. 

 We headed off to Home Depot for 2x4's and plastic and we picked up some small fold able scaffolding which has turned out invaluable, both of us can get up there and attach all the framing. Working over head is hard work for sure.
 So here we are now it's 8:00 pm and the coffered ceiling grid is framed and blocked , all the three sheets of 5/8" MDF have been cut down to 5.5" strips and a bunch of it has been primed and is ready for sanding and more priming before we can nail it all into place, this is getting so exciting. Placement of the studs and finding all the joists was very time consuming but I think the rest will go quite smoothly.
I'm thinking our arms will be sore in the morning.
My daughter would kill me if she knew I was putting a pic up on my blog of her , so don't tell her Ok, she is growing up into a beautiful young lady we are very proud of the person she is becoming she is a good kid indeed. I just thought she looked so beautiful the other night going to a high school winter dance. How time flies when you have kids, it's sad how fast.
Have a wonderful weekend...