Sunday, July 30, 2017

5 great tips for saving your sanity while living through a DIY renovation


check out my top 5 great tips to help you keep your sanity through your DIY renovation

It truly is amazing the power that white paint has...I have chosen to use para paints melamine paint for our trim in Simply white... it is a nice neutral white in our space...this room has truly transformed over the last week, it all has just come together...it feels light and airy and fresh and happy...I am loving it...the painting is about 95% complete...I see the finish line in sight. Isn't it amazing how many coats of white it can take though...


                                                                           before

Although I am not totally in love with the creamy paint on the cabinets painting all the trim out white and the island huronia by para it seems much more livable for the mean time.

{GREAT TIP #1: it's ok to make small changes that are part of the overall design plan ahead of a full blown makeover...like here how I went ahead and clad the most visible side of this island, although I will wait to paint the rest of the island when I tackle painting the perimeter cabinets, this has made me happy to see a little bit of my vision come to life.}

I fell in love with this tile from home depot and I am planning to use it in our laundry room...but for now I felt compelled to turn it into a trivet...I am now wanting to use this patterned tile on the risers of our stairs...won't that be beautiful...?
                                    https://www.pinterest.com/pin/174092341828513350/


{GREAT TIP #2 : don't rush right into making big changes, it's always best to live in a new home for a while before making big changes as you will find out so much about your space only after living in it for a while...so slow down and don't rush in.}
I was able to find a great local manufacturer to work with for me to design to my specs these steel brackets inspired by many Fixer Upper makeovers...I'm thrilled with how they turned out but its obvious I need a third shelf...which means I am off to order more brackets, I will be offering them for sale through my White Wood Studio facebook page.

after removing the wall hung cabinet, that we will relocate, I sourced some matching tile because I really do love this white tile...it was a nice quick install to add a few more rows.


                                                                     kitchen before
As you can see I have yet to install the beautiful baseboards but I am waiting to complete the tile in the entry before I get to the painting and install of the baseboards, I am excited to have them in place.
{GREAT TIP #3: don't pressure yourself to finish every little detail within a tight timeline, celebrate the victories along the way...it will motivate you to keep going.}

I love how this Metrie panel trim I added under the chair rail looks, it seems like it has always been there...


I just love these lamps I found at Lowes, I like how I was able to choose the shades that suited my design style, so many options. link here to the lamps  and shades 


I added a few extra hooks in the entry just for a little bit of extra black visual interest...these will be available for company.
 Recently I installed the corbel table I had been planning for many months...this pushed me to finally get my husband on board to install and extend the tile in the entry.


excuse all the computer modems in the entry...it's all moving very soon.


my poor husband... I got all the supplies...but somehow I bought the rapid set thin set...not what you want for a first time diy tile job.... so lets just say it didn't go so well...after a few days some of the tiles were popping up...it was a bit crushing, so we decided to go with the pre-mixed tile adhesive for flooring...for our second attempt...we will stay off the area extra long and hope all goes well this time...


                                                         sad sad...set backs are for learning
 { GREAT TIP #4: when things don't go as planned stop and figure out how to solve the problem before calling defeat...no one's DIY journey is without challenges...problem solving is a big part of the diy journey...progress not perfection...}

{GREAT TIP #5: try to enjoy the process...and your accomplishments and take time to step away and enjoy some time away from your diy projects...sometimes we can get sucked into this rabbit hole of home improvements...get out of the house it's good for the soul and the body...}

so to recap...the entry is in limbo but getting there, I'm hoping by next weekend it will be fully functional...and that I can get this pew out of my dining area...
the kitchen has some more tile and some open shelving...oh yeah...
the living area painting is mostly complete and looking lovely and light....

it's a marathon not a sprint over here...learning much patience...
Wednesday, July 19, 2017

Metrie moulding upgrades lead to kitchen upgrades

We have recently decided to buy a pick up truck, its a country thing so I am told...its time.... when we were in discussing financing the man we were speaking with said we had only been in our new home 8 months...and I thought wait...what...? its been 8 months already...holy cow how can that be...the first 5 months were a little rough and cold and full of drama but I did not think we were really into 8 months...I've been taking life one day at a time....I have been in slow motion as far as reno's go...compared to my usual speed, ganted I am living a much busier life now.

Part of my delays are because we have had to get permission to change some of the elements since they are protected with heritage by-laws...and other issues that have slowed down some design improvements would be decision making...I want to do them once as far as design elements....

I have come to a realization recently that all the bloggers I know or follow....well when we are looking for a new home we look for homes with potential...we clearly desire fixer uppers...a place to transform and to make our own...what is a diy blogger without a home to make pretty...I wonder if we move more often than regualr people..???.when the home is done where is the thrill...it is some what of an addiction...I have seen a rise in some bloggers getting summer homes, cottages or rental properties...what fun....like Rambling Renovators &Young House Love 

To most our house would have looked perfect upon buying... it had a new kitchen and modern bathrooms but to us it was lacking a lot of much needed style and character...I mean don't get me wrong it has a lot of character...original pine floors and wainscoting ,beautiful lights, but it needed that designer touch that I could give it.
 With an open concept home everything intersects so although I started with the entry I also needed to tackle the wainscoting at the same time throughout the whole main floor....a big big job...its that trickle down effect of home renovations.

Oh the old lovely pine paint grade v-groove wainscoting...it had a sponge grained faux finish that was applied a long long time ago to fake the look of a wood more luxurious than simple pine...it was stripped before we got here but it was in rough rough shape after being stripped...we could see that a trim piece below the chair rail was missing and the baseboards were just flat stock pine...not what we would want to see in a building of the 1800's...so we hoped to paint the wood out a creamy white to help us with two issues we saw...to disguise the damage caused by being stripped and to allow us to easily bring in new appropriate trim and baseboards...when we are done you might wonder if it was all original...thats the goal.

         I am so thrilled to be working with Metrie on this mammoth project, a restoration/ home                                                                         improvement project.
After looking through the options for baseboards I was most drawn to the French curves line...the simple lines and soft curves of the scene II paired beautifully with our existing trim throughout but did not overwhelm what was already here...we went with the 7 1/4" size which felt like the perfect proportion, I chose poplar as poplar is a beautiful wood for painting, although poplar can also be stained very successfully....in the past I have opted for MDF when adding trim that is to be painted but since we have all original wood it only made sense to go with wood in this case.
                                                    (French curves scene II line from Metrie...)
 It was a little scary to start painting over this wood but now that I have most of it painted it was definitely the right decision...I am using kilz primer and lots and lots of white paint...looks like three coats if not more will be needed. Oh I almost forgot all the DAP I used to refine the v-groove, its feeling so much cleaner but still lots of character.
 The house is an utter mess, windows are coming out, the window casings have needed scraping and sanding and lots of priming, its a good thing we have a variety of ladders...I'm getting tired of the messes already...lets hurry this along.
 I decided to get the bulk of the painting done before adding the trim, but wow it sure is the icing on the cake...it looks like it should have been there all along. I used the french curves scene II poplar panel mould here to accentuate the chair rail and to conceal unsightly gaps.
 So as you could tell by the first photo the kitchen changes that I wasn't going to start kind of got started...one day I had a couple of hours to kill and decided to see if I could easily remove the island top so I could sand it to re stain it and fix some really bad gaps that became food traps. Well to my delight the unfinished bottom was just the look I was after that rough sawn texture was dreamy....so I removed some old gum and smoothed out the surface and filled all the gaps and stained it with a multitude of minwax stains...I believe I used special walnut, black, classic grey and weathered oak to get this one of a kind weathered look, a few coats of satin poly and it was perfect within two days.

That set off a chain of events...next was the grout, I love contrasting grout so I got a grey grout pen from SamaN and in a short while I had this nice soft grey grout...love it.

well with the nice new island top I couldn't put off starting work on the island facade...I added a v-groove in a ship lap style and painted it huronia by Para...in melamine...and although I was hesitant because of the old melamine oil paints that left cabinets looking dreadful I was pleasantly surprised....it was the most amazing paint, so pigmented and thick, it was a dream...so much so I opted for melamine for our final coats for our trim work in simply white.


 I don't know if I have mentioned it before but I am not exactly in love with those big gothic shaped windows above our kitchen...after much debate I lost the fight to remove or cover them...so one night I got tired of looking at that one and I climbed way up and started to prime it...honestly I hate heights and 10 feet in the air is so scary to me...but once its done its done....immediately it was obviously the right move and I don't hate it anymore...

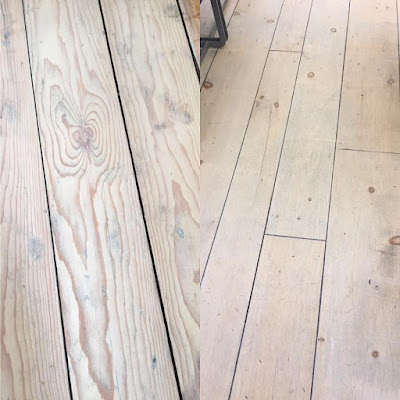
down to the floors...yet another trickle down issue that needs to be resolved...we need to sand the floors before installing the baseboards....oh man...fun times...these floors are tricky...we think  we are going with white washed...but we will still have to see what happens in the end I suppose...I just worry the white will be too much white...scary...I'll figure it out.

                                        So that is where we stand...things are moving along...
I have to finish the painting, then adding the trim and more painting, the sanding of the floors and installing more tile in the entry and and I took down some cabinets in the kitchen and I luckily sourced more of the white tile I love on the back splash and I am having some custom brackets made for our open shelves...lots and lots to do...
                                               its really starting to feel like home...finally.

Sunday, July 2, 2017

Farmhouse mudroom foyer makeover


 I am happy to say I am half way there with our entry foyer...I still have a lot of painting to do as well as baseboards to add...and more of this tile to extend this area...but for now it will function in the meantime.

what a difference some white paint, a new door, removing the sliders and painting the stained glass accents black make...it is all modern farmhouse now.

we were never a fan of the all brown look and those bedroom closet sliding mirror doors...those were not ever my thing, and those front doors were awful, leaky and unusable due to swelling in the winter because they were interior bedroom doors...


                                                   I started the closet with a blank slate...
                                      added a larger scale casing and lots of 6" pine v-groove
                                                                        a bit of primer
                                                            lots of birch white paint
               I found some great hooks at a country store near by...and added a shelf on brackets
added three rough boards stained almost black for shoes...
and now this heritage wall just steals the show as it should

I think there is the right amount of wood accent now...I kind of love it...I had planned on putting doors on this closet but everyone in the house loves it open and lets face it , it will function much better open and since it is in an area not visible to the rest of the house I think this will function beautifully as a true mudroom...fitting for a farmhouse...this church house is my farmhouse...it backs onto a farm...and it is our house...I'm good with this rationale.