Sunday, November 30, 2014

Week 6 dining room renovations & built-ins

I wanted to show in photos as many stages of my build that I could so that if you wanted to build something similar you can see how I built my project.
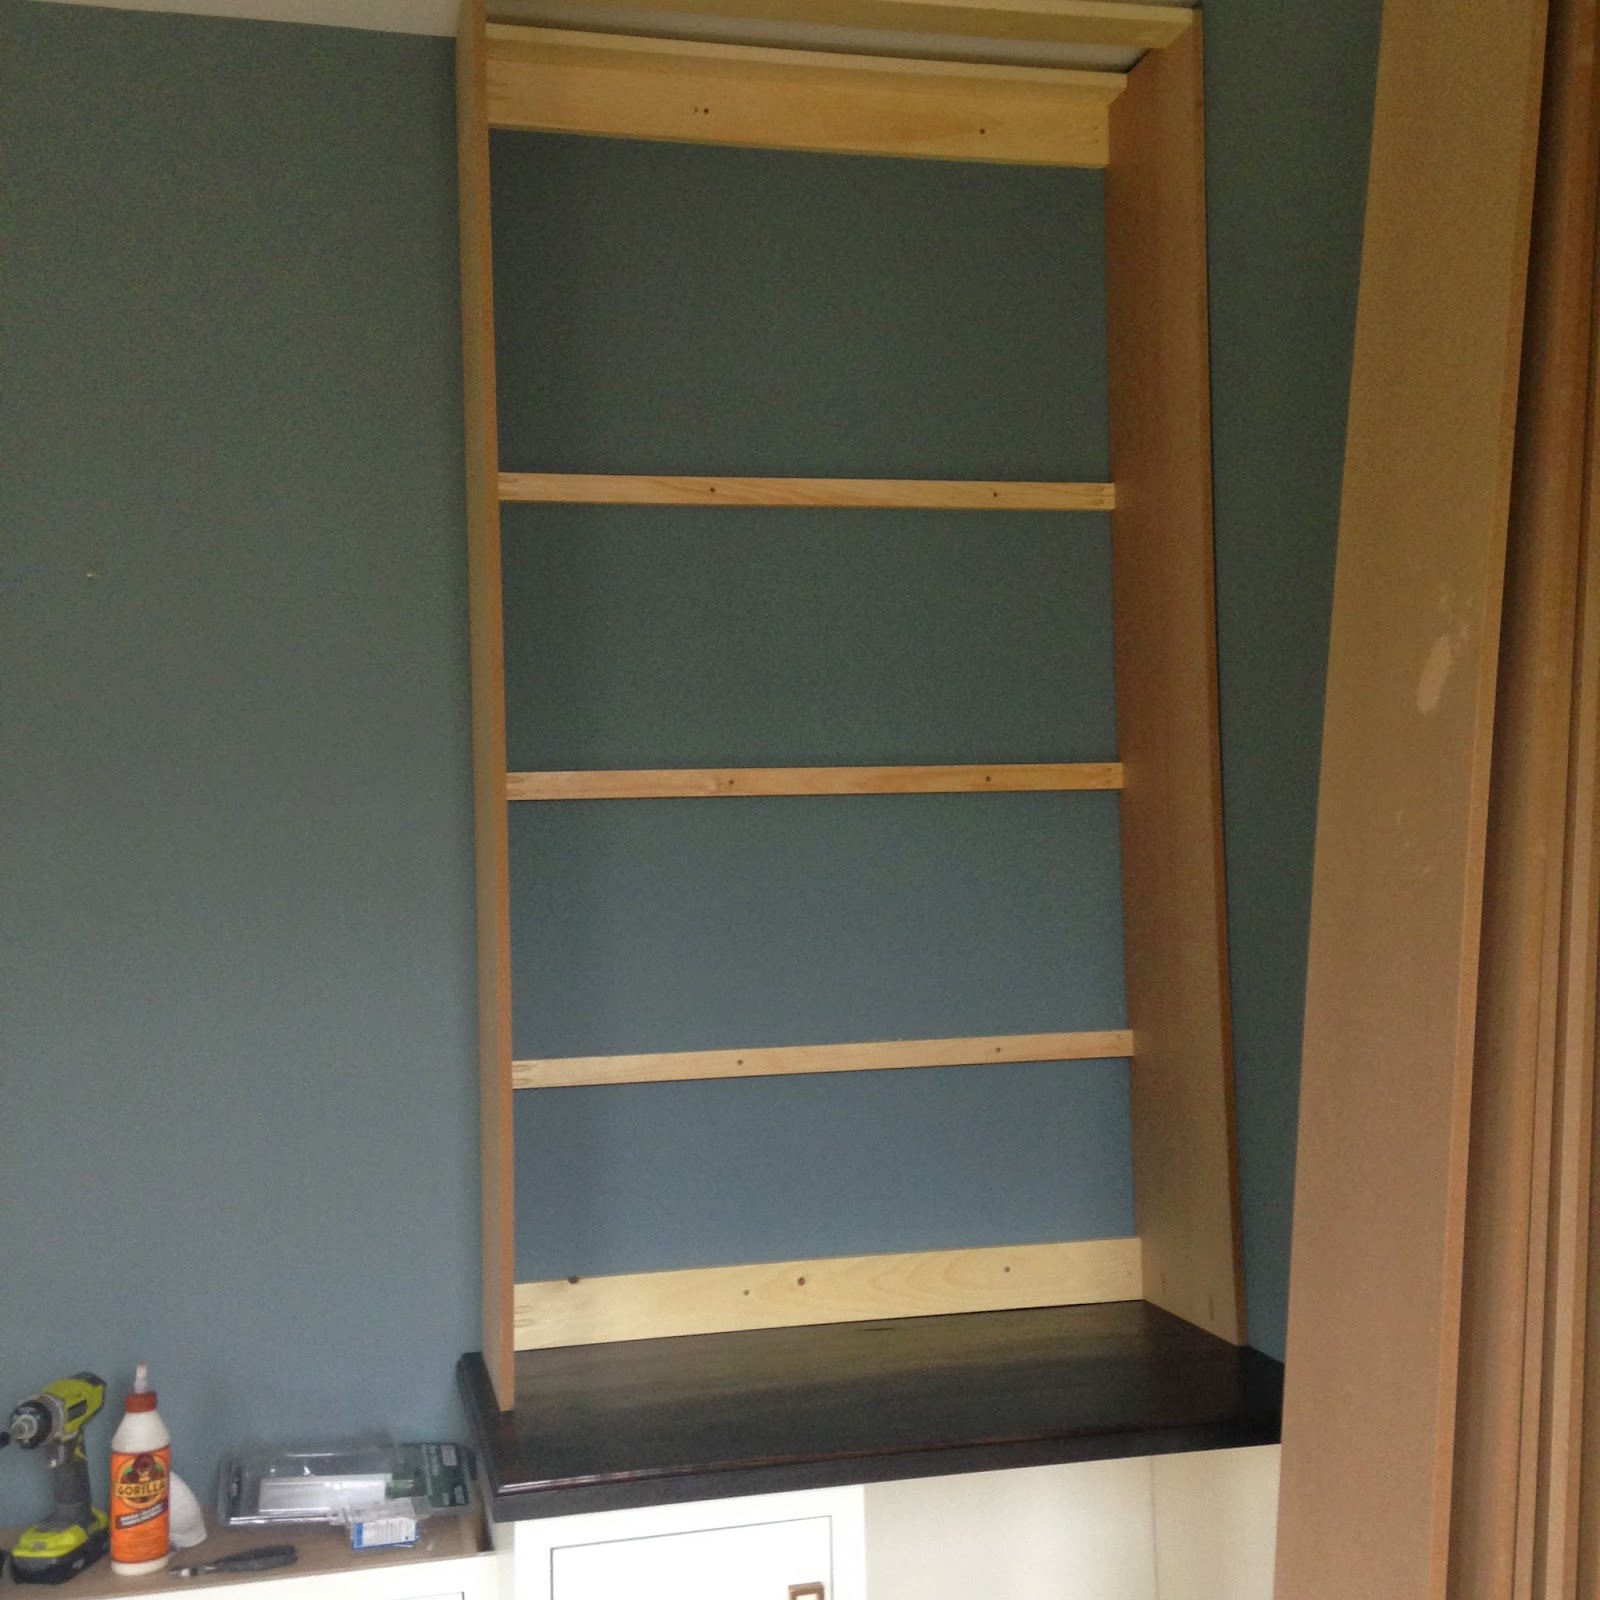
So I added the vertical pieces and then I added braces for the shelves attaching them to the studs and to the side panels with pocket holes.

I decided to make the thicker shelves out of 2 pieces of mdf simply glued together...I just clamped them and let them sit for 20 -30 min and then installed them using clamps to help me place and level
the shelves as I installed them. I screwed through from the outside of the side panels but in hind sight I would just drill pocket holes on the bottom of the shelves and attach them from the inside next time and use plugs to hide those holes.

the 

I then filled holes and added more 3/4" supports to the backs of the shelves so that I had something to nail the wood backing to.

  
I cut 5.5"planks from plywood for backing the shelves.I stained this plywood the same Kona color I love then top coated them with satin clear coat and rubbed them down with a fine steel wool to achieve a nice smooth surface. I used sureplay underlayment because I love the backside the way it looked when stained.
Priming and three coats of paint was much easier with out the face frames...
I cut off 3/4" off of a pices of 12" wide mdf to cover the upper part of the bookcase to hide the bones...


I am getting so anxious to get this project completed to get the wine cooler in place a to have this room furnished and ready for fun...
I am even surprised at how long this is all taking but every step seems to require a step then waiting another step then waiting....I just want it completed already because I am ready to get decorating for Christmas...

I am  hoping to get all the backing installed today and the face frames completed...hopefully things will go smoothly and I will have the built-ins completed today....then I can get to sanding the floors and a couple of days of snading.
Wednesday, November 26, 2014

Adding upper shelving to built-ins

I decided to keep the uppers shallow as to not block the window..which  meant I could use MDF 12"x 8' boards which are under $6.00 each.... I was going to take a break and not install these uppers at this point but I figured why not just get it done now. 


I really love having 9' ceilings, these built-ins are so tall.
I used 1x3" pine to create these simple boxes I attached them using Kregjig pocket holes.

 Here I am testing out some shelf placement.
As you can see creating these boxes is really simple 4 boards and 2 sides that's it, this will all be hidden. I can use these pieces that lay up against the wall to attach the boxes to studs in the wall.

Today I will work on the shelves which will be thick 2" shelves....I just don't know if they will be painted or stained...I will know when I go shopping for materials.
See you soon.

Sunday, November 23, 2014

5 weeks of dining room improvements

I can't believe I have been slowly plugging away at this dining room project for 5 weeks when last year it took me 2 weeks to complete a coffered ceiling and flooring install in my family room , spraining my ankles this summer has really changed how quickly I move...safety first.

 How can installing doors and knobs be the hardest part of a project like this....but it always is...turns out I was given not quite the right screws for the knobs, well that caused a lot of frustration...making a simple jig for the knobs prooved harder than it seemed resulting in the first door having the wrong holes being drilled so that mean a repair...and finding the correct screws to replace the ones that had been broken in my attempts to install the knobs resulted in a very long search for the correct screws...european hardware!!!! So I am relieved the doors are in and the knobs are on and centered...now I can move on to the floor.


 I am loving all this new storage.

Hopefully I will get to the uppers very soon because I can't wait to see how it looks. I am getting excited to get this room put back together, I think the ceiling will have to wait till after the new year...I need to focus on Christmas.

Thursday, November 20, 2014

Dining room update...priming and painting


 After taking some time to consider my choices I thought I would go ahead and try painting the built in white, well Vermont Cream...I had planned on painting it dark but I started to question it and when I asked my husband what he thought he said white...I am very unsure about the white but I am going to follow through with this current direction.
 I drilled a hole and used this outlet cover to keep it looking clean, I will be keeping the printer in the far cabinet so I needed the cord to fit through to the outlet.
 I picked up a fresh paint tray and some velour rollers for the smoothest hand rolled finish...
 when I saw this photo I thought it was the perfect compromise of the dark and white...I think these built ins are beautiful and if mine look anything like this overall look I will be happy.
 I wanted to show a pic of the backside of the filled pocket holes...they look pretty good I think.
 I have one more coat of paint to complete and then tomorrow I will be able to install all of the doors.
 I'm hoping I will love the way the brass hardware will look... then its time to install the tops and then it will be time to sand the floors then stain them. We might just have a dining room for Christmas.
Let's all enjoy the before...


Sunday, November 16, 2014

DIY shaker doors

I thought I would do a little tutorial on how I made these simple DIY shaker doors they are really quite simple to make and cost me about $10-12 each...they might be worth a try for your next DIY project.


I needed 7 doors for the current dining room buffet project I am working on...I am trying to keep on a tight budget and having doors made for me would have cost about $35-40 a door which is pretty good but I thought if I could save $$ on the doors I could put that towards the marble peice I want for the middle section of the buffet. $280 plus tx for custom doors or $70 for DIY doors....it was a no brainer. (don't worry I did swap out the plywood in the last door to match the grain of the others)
I promise it's easy...
How I keep it really easy is by using unfinished pine flooring which is available at most lumber stores at under $1 a linear foot.


Tools & supplies you will need:
miter saw
pocket hole jig
clamps
table saw
drill
orbital sander
1/4" plywood
pine flooring wider than 3" I used 5"
1 1/4"  kreg screws

Step one, using a table saw you will need to rip off the tongue of the wood flooring , I chose to make my rails and stiles 2 1/2" wide

Step two, miter your top and bottom pieces to the desired size. Make sure to sand the grove side of your wood.

Step three, drill your pocket holes onto the back side of the stiles.


Step four, you will need to cut the plywood or bead board if you choose to just slightly larger than the opening, 5/16"-6/16" is good (just over a 1/4")

Step five, using a clamp to hold your miter together attach the stiles to one rail then slide in the plywood and then attach the bottom rail. You don't need to glue the joints as the screws will hold the corners well enough. The center panel will just sit in the groove and can expand and contract freely.


Step six, starting with 80 grit of sand paper sand all the joints flush and smooth I then followed with 150 grit for all the edges and front and back of the frames then a final sanding of 220 which left it perfectly smooth and ready for priming and painting. I then decided after all the sanding to fill the pocket holes followed by another final sanding, the pocket hole plugs I thought I would use were actually micro pocket hole plugs so I went with filler instead. I know a little backwards....I hook up my orbital sander to my wet dry vac for all my sanding.. if you can you should do this and wear ear protection, eye protection and most importantly a mask. Of course you can use pocket hole plugs and glue them in place let them dry and then sand them flush or use a japanese flush saw to cut off any excess followed by sanding.


Well there it is my tutorial on how I build simple shaker doors with mitered corners for approx $12 each...

Please feel free to share and PIN and if you have any questions please feel free to ask me.

Please let me know if you use this tutorial I'd love to see what you have done.
I typically use this style of hinge it is a non-mortise bi-fold hinge...I like to see the hinge.


Thursday, November 13, 2014

Plugging away at the dining room makeover...DIY DOORS

I thought I should probably do a little update on my dining room project as things really took a leap in the right direction yesterday...DOORS
 Slowly but surly I am still working away at the dining room, I am not letting it take over my life so it is going slowly but I am OK with that , there is no rush.
I had to dry fit the solid tops I made last week just to see how they would look in place, they look just as I had hoped, victory.
 So excited to see the wine cooler in place hopefully very soon...perhaps in a week or two if I'm honest, this family keeps me busy.
 Things were really looking up now that I was able to dry fit some of the doors. I had considered having custom doors made but I figured I would just go ahead and build my own like I did for the laundry room sink cabinet.... Just simple shaker doors, this was going to save me about $260 at least ...that's a lot of $$ to put towards oh the marble I want for the middle section. Shaker doors are kind of pricey to have made and mitered corners are even more expensive.
I made this door 2 years ago and it is holding up very well, so I figured it was worth trying again, this time I used pocket holes and that kept things simple and it worked well so I'm sticking with that, simple and cost effective.


I swear it looks as though my Ryobi tools are product placement but I swear they are just always around...you are welcome Ryobi...feel free to send me any Ryobi products to repay me....wink wink.
What a difference a couple of weeks makes.
I decided to use this sureply which is a flooring underlayment if I am correct....the side rails of the door frame are actually pine flooring I ripped down to 2.5 " , the groove perfectly fit this material so it was fine by me...all of the built-in will be painted so it will be fine. So far I think these doors have cost me about $30...well that's not bad at all is it?
Of course I was 2 small doors short of flooring so I will be off to the lumber yard this morning to finish this door part of the project.
Next I have to do a lot of sanding then priming and I should decide on harware becasue my origional idea isn't going to work after all...I would love a contemporary brass knob but they seem hard to find around here.

I just have to show you this beautiful tree in my yard, it's one of the only trees around still with its leaves and this orange is so stunning in person it is spectacular.

I hope you are enjoying this fall...I think some snow is in the near future which makes me sad... oh well that's my issue...thanks for stopping by.