the kitchen is coming along nicely...I love the blue that I painted the island and adding the shiplap has really made a huge difference to the whole feel of the kitchen...its Huronia by Para...
much like in our last kitchen I wanted to add some bases that look like a furniture detail...I will eventually get around to painting the perimiter cabinets but for now I will focus on the island...and the details were lacking so I made some easy changes...
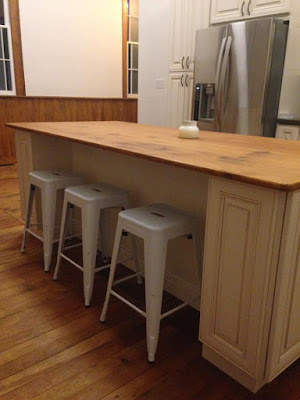
here is the island how it looked when we took posession... the top is made from old pews {super cool} but it was a very orange tone that we did not like...I like the wood but not the colour so I took it off and sanded the bottom and stained it and made it the top and now we love it....and I really think that sticking cabinet doors on to the ends of cabinets is kind of strange so I knew that wouldn't stay long...
as you can see we have new windows...and they are AHmazing....and addin the open shelving really gives it that open feeling...
the next step was to remove the decorative doors and to add shiplap v-groove...
and paint out the trim on that windows...boy was that the right thing to do...
I then painted the new wood Huronia by Para in a melamine paint...which has been such a nice paint to use, it goes on beautifully and covers so well...but that is as far as it went from July until Oct...I've been moving at a much slower pace over the last year....there is a lot going on in my life so when I can get to it I tackle my DIY but it is not like it used to be...quick quick quick....
it's truly amazing that making a few changes can even make a huge difference...I thought we had to strip and restain the floors but now that they are the only warm wood they look quite nice...they have a lot of character... I can't mop them as they are rough but I will remedy that over time... a good sand and some poly and they will be great...
although the other side of the island is still off white....and may be that way for a while.. I can live with that....because from where I sit right now it looks pretty good...so I can live with slow going progress.
here are some great examples of furniture foot details from my Pinterest
Kitchen board you will find these photos and the links for them and lots of other beautiful kitchen inspiration...they were the push I needed to add this detail to our kitchen.
I built this simple and easy furniture detail and I'm going to try to explain how you can do it too....
I used 1x 4 " select pine I ripped it to the height I needed it to be to fit under the cabinet into the kickplate area and cut it to the width that I needed it to be, then I drew on the design I wanted for the cut out...and I cut out the shape...
here is a photo from our last kitchen ...I think you can add this detail to just one area or the whole kitchen but it just adds so much style and it is a very inexpensive simple detail...
I used my new
Ryobi band saw which made this job really easy but you could use a jig saw or even a coping saw...if you don't have a band saw...
the center cut is the hardest piece to cut, but it is doable with a table saw...this would be a very hard clean cut to make without a table saw...you just make most of this cut by bringing the wood down carefully onto the blade....
I added wood to the back of the detail piece as shown, I just did a butt joint and used my Ryobi
airstrike and brad nails...it is now square and ready to install into place...I added filler pieces behind to afix this detail.....so it is 4 pieces of wood, that is it...
what a difference...
I am testing how well this paint will adhere to these very smooth painted doors...if all goes well I will be painting the entire island and adding new hardware...if you would like to see a good tutorial on how to paint kitchen cabinets
click here
I hope that maybe this was somewhat helpful...till next time...
*this post has been sponsored by Ryobi tools...but I only recommend using products that I fully believe in and use myself.


