Thursday, December 11, 2014

dining room final reveal

 I am so happy to say this...the dining room makeover is complete...oh my I'm lying I still have to finish the crazy amazing crown moulding but that is for the spring.
For now here is my new dining room...
 Nightime shot right after we moved the furniture and wine fridge in, it was fun to just sit back and enjoy all my hard work.


It's time to plan a dinner to christen this room, what do I make???
We really need to get some wine and soon no one wants an empty wine fridge, I drink Pinot Grigio and Sweet sparkling wine just in case you are wondering or want to donate.


 I put in a wood register I finished just like the floors, I need a whole lot more like this, it makes such a huge difference over the stark white plastic ones.
Here is the before, this is how it looked right before we moved in, plus some cheap carpet.
 Right after we moved in this room was our staging/storage area for months.
 This all has come a long way from when I dry fit our fridge...I am sure some people wondered how this all was going to turn out.

It was sad to see this pine floor go under a coat or two of stain but it was the right thing to do, it's so nice to see how one room flows into another seamlessly...I love my dark stained floors.

Thanks for joining me during this long journey...I am very glad it is over and I am happy so happy with how it turned out, even better than I had even dreamt it would, it was a whole lot of work and I want to say a thank you to all who followed on instagram for all my daily updates and encouraged me ever step of the way, it made the journey so much more enjoyable.

One more thing I want to mention, big congratulations to Mel of  Broadview Heights blog who won the Scentsicles giveaway...


Thanks for stopping by, cheers for now...Chris

Monday, December 8, 2014

Dining room built ins...are complete


I am so happy to say that the built in project and dining room project as far as the permanent changes are all complete...well there are a few minor paint touch ups but that is it...and I will admit I love it...it feels like Christmas morning and I couldn't be more thrilled.

The floors are all stained Kona and top coated three times...now we wait three dayd for the full cure to move furnture back in to the room. 


 Although I have to wait to move the table and chairs in I didn't have to wait to put my pretty things on the shelves...I thought I would have a lot of shopping to do to fill the shelves turns out I had more than enough that has been always hidden away that I can finally display and enjoy.
 I am going to have to buy a lot of wine for the wine fridge though...can I please put it in already, I am dying to see it in place.

I am trying to decide if the room can handle a 60" round , until I decide I will put our 48" table and four chairs in on Wednesday 3:00pm  

Let's just go back 7 weeks to the sad state this room was in...I am so happy to get my life back...this poor house needs a deep clean thanks to this renovation...gotta grab a new furnace filter...don't forget to change those after a big messy project.
I can't believe I get to enjoy this room never mind that I created it too....sometimes I amaze myself...

Guillaume Luxe Faux Fur

I love faux fur blankets...there I said it! A couple of years ago I won a faux fur blanket as a prize for my Christmas decor and I have been a faux fur junky ever since... everyone loves faux fur in this house even the dogs...the only problem with some faux fur blankets is that they aren't machine washable but this one is....!
I was sent this Guillaume luxe Camel Leopard blanket to review and I have nothing but love for it...
it is incredibly soft and beautifully designed, it is large and it is machine washable...and it available only on The Shopping Channel Canada at the showstopper price of under $65 it is available only on TSC on December 10 &11th 2014...


 In fact its been hard to find ever since it arrived... one of my teenage daughters has taken it, she just loves it too, I had to hunt for it to take some photos to show you how lovely it is.
 There is nothing more cozy than a faux fur blanket...
 This is the Camel leopard but more options are available,
Grey leopard
Ivory lynx
Mahogany mink
Navy mink
Plum mink


I got to put my feet up and enjoy this blanket for myself after a long hard day working on renovations...even if just for a little while.

It's an amazing value for sure what a great gift to give or get.
Remember December 10 & 11th 2014 The Shopping Channel Canada


this is a sponsored post but the opinion is mine


Sunday, December 7, 2014

It's Christmas tree season...a Scentsicles Giveaway

 Things have been very busy again this Christmas season due to my major renovations going on but now that it is December I had to get some much needed Christmas decor started...the kids kept asking "when are we going to put up a tree?" so I finally dug out our artificial trees and got them up.
My husband is allergic to real Christmas trees so we have never had a real tree...in fact we only had one real tree when I was a kid and I remember the smell, it is such a great scent.

I don't know how I didn't know about this product Scentsicle's but it sounded pretty neat to me...the smell of a Christmas tree but none of the hastle....
 Canadian Tire was kind enough to send me some Scentsicles to try out for myself....I have to say I really love the authentic smell of the fir but they have several scents to choose from.
 I tucked 4 scent sticks deep into the family room tree...both times the girls came in to the room they both remarked about the smell...so it works that is for sure.

 oh I need a manicure....

I love how I can have my glitz and glamour theme and the smell of a Christmas tree all at once...


Thanks to Canadian Tire and Scentsicles I would love to send one of you some Scentsicles to try out for yourself...
Please leave a comment to enter the give away...giveaway draw will be on Wednesday December the 10th, 2014.

Tuesday, December 2, 2014

from sketch to reality

 It all started with a little sketch a full wall of cabinets with two tall open shelving units.
After a lot of hours and days and weeks of plugging away I finally have my completed built-ins.
I think that they turned out even better than I had hoped for.
 The corner window and bulkhead proved a little challenging but I think it turned out great.
I took a lot longer than I had thought but when I stand back ad look at it all done, well except for the marble I have yet to get it was all worth all the hard work and long hours and money spent...I figure easily this built-in would cost $3000 plus to have done and I'm not sure what it cost me exactly but let's just say it was a fraction of that cost.
 I am so looking forward to getting the floor stained finally. I will first screw down any areas that aren't as flush as they should be, then I will make a mixture of saw dust and glue and fill an gaps before I do the final sanding.
 I especially love how these shaker doors turned out and I am so glad I went with the contemporary brass hardware.
 Close up of the stained wood backs and trim detail.
I am really excited to see the wine cooler in place full of wine and with the lights a glow....I am really looking forward to having our first dinner in this room...very soon.

See you soon...

Sunday, November 30, 2014

Week 6 dining room renovations & built-ins

I wanted to show in photos as many stages of my build that I could so that if you wanted to build something similar you can see how I built my project.
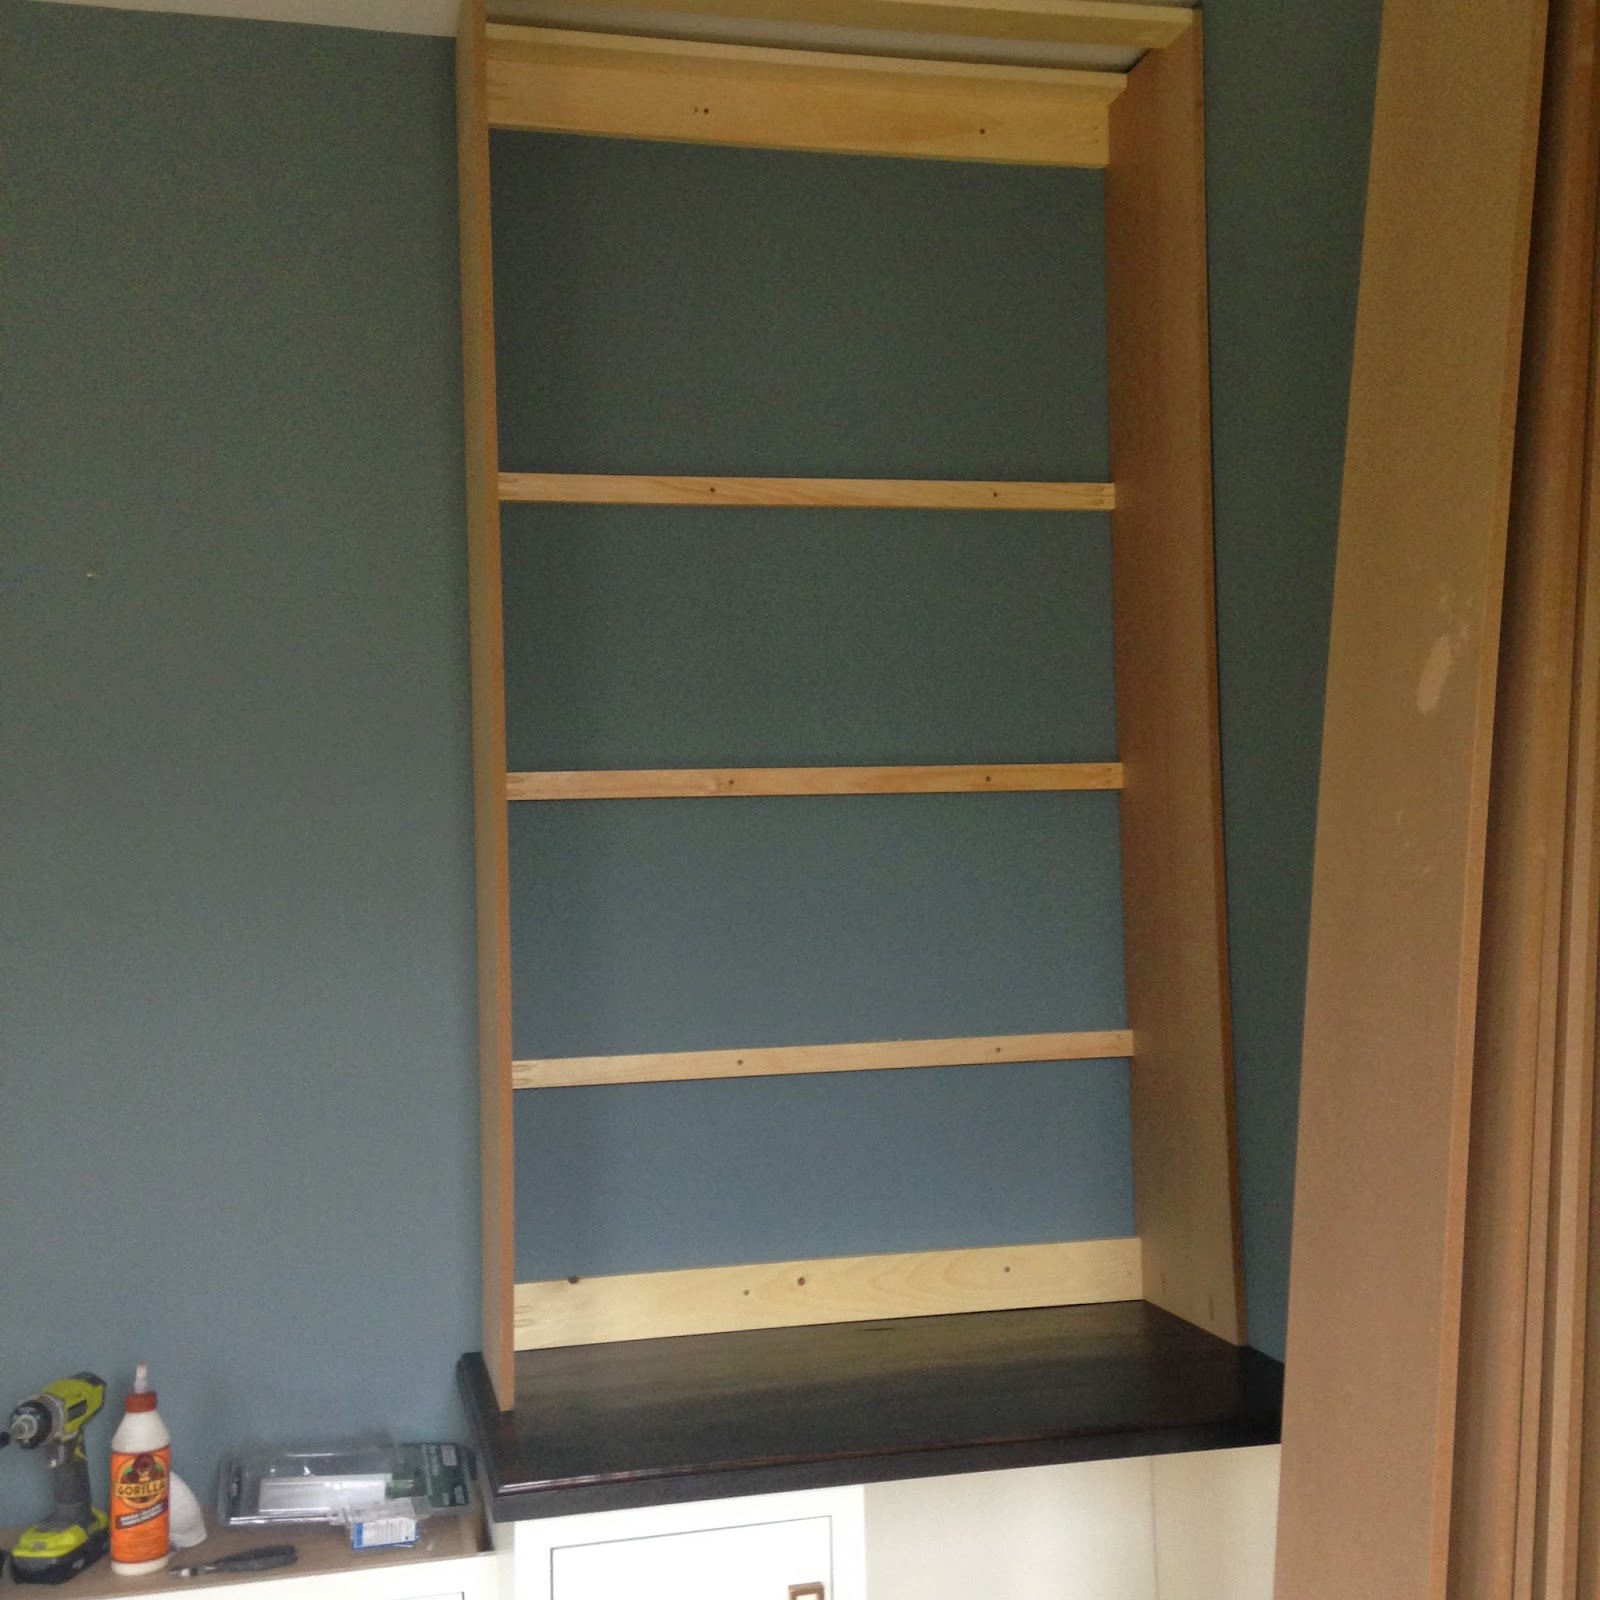
So I added the vertical pieces and then I added braces for the shelves attaching them to the studs and to the side panels with pocket holes.

I decided to make the thicker shelves out of 2 pieces of mdf simply glued together...I just clamped them and let them sit for 20 -30 min and then installed them using clamps to help me place and level
the shelves as I installed them. I screwed through from the outside of the side panels but in hind sight I would just drill pocket holes on the bottom of the shelves and attach them from the inside next time and use plugs to hide those holes.

the 

I then filled holes and added more 3/4" supports to the backs of the shelves so that I had something to nail the wood backing to.

  
I cut 5.5"planks from plywood for backing the shelves.I stained this plywood the same Kona color I love then top coated them with satin clear coat and rubbed them down with a fine steel wool to achieve a nice smooth surface. I used sureplay underlayment because I love the backside the way it looked when stained.
Priming and three coats of paint was much easier with out the face frames...
I cut off 3/4" off of a pices of 12" wide mdf to cover the upper part of the bookcase to hide the bones...


I am getting so anxious to get this project completed to get the wine cooler in place a to have this room furnished and ready for fun...
I am even surprised at how long this is all taking but every step seems to require a step then waiting another step then waiting....I just want it completed already because I am ready to get decorating for Christmas...

I am  hoping to get all the backing installed today and the face frames completed...hopefully things will go smoothly and I will have the built-ins completed today....then I can get to sanding the floors and a couple of days of snading.

Wednesday, November 26, 2014

Adding upper shelving to built-ins

I decided to keep the uppers shallow as to not block the window..which  meant I could use MDF 12"x 8' boards which are under $6.00 each.... I was going to take a break and not install these uppers at this point but I figured why not just get it done now. 


I really love having 9' ceilings, these built-ins are so tall.
I used 1x3" pine to create these simple boxes I attached them using Kregjig pocket holes.

 Here I am testing out some shelf placement.
As you can see creating these boxes is really simple 4 boards and 2 sides that's it, this will all be hidden. I can use these pieces that lay up against the wall to attach the boxes to studs in the wall.

Today I will work on the shelves which will be thick 2" shelves....I just don't know if they will be painted or stained...I will know when I go shopping for materials.
See you soon.