Friday, November 10, 2017

New black windows...

 
So I'm not going to go into too much detail about what lead to this particular project but let's just say we needed to replace all of our windows...all 12...8 foot gothic windows...it was not a project we anticipated at all....but it was a project that became urgent....we needed to get these windows replaced before we faced a second winter living here....
The search began...I called dozens of window people...they would find out the age of the house and they would quickly get off the phone or not call us back....how can that many people lose my number..???.
It became my job to find a solution...all the while I needed to meet with the heritage committee because our windows were a protected feature of this old place...140 year old stained glass original windows.
The process was painless with the heritage committee...we all have the same goal...save this building...nothing should be done that can harm it or jeopardize this building lasting for decades to come...it is the last remaining frame church still standing and it is a treasure.


 This is a photo I took the day we took possession December 12th 2016...this house now looks completely different...we think we have given this place the finishing touches it needed.

Today...November 2017
The center of the windows was etched ...
We met with about 6 companies here and most said they couldn't help us...they didn't want to do this job...many were at a loss as to how to remedy our issues...we were really stressed about the windows...like I said this needed to be resolved before another winter...too much was at stake.


 As you might notice we removed several of the interior lower sashes...one of the problems with the windows is that they didn't open....but they do now.


Aren't they beautiful....? 
All the old windows have found new homes...most went to local residents and many even went to family members of the original builder of these windows...


I finally found a window builder....we had to go with wood windows and I wanted to find someone that could truly make us the proper wood windows that were in keeping with the historic style and were thermal....
We simplified the design but were inspired by the original windows...we wanted to go with clear glass as stained glass thermal was not an option...and we opted for painted and chose to go with Jet black by Benjamin Moore...that was definitely the right decision...the windows are such a huge feature and going with black only accentuated them...we love the new windows...we got them in September and immediately opened all the windows and let all the fresh air in...

The company we chose was local to the Toronto area and I had seen that they had previously done gothic windows so I hoped they were the right people...immediately I knew they were the right people. I was able to visit the workshop where the windows were going to be built by hand....

So the windows are mahogany and another wood....oh I can't remember now...they are true divided lites and tilt in sash style...I was able to select the hardware for the windows...they are incredible windows...when they arrived we were blown away...
The installation was pretty major, a lot of repair work had to be done... this was not a simple pop out and in job...every window jam had to be cut out there was a mess in there....I'm not going to get into it...I just need to try to forget about it honestly....I keep saying I am going to write a book about our experience moving to the country and into an old home...
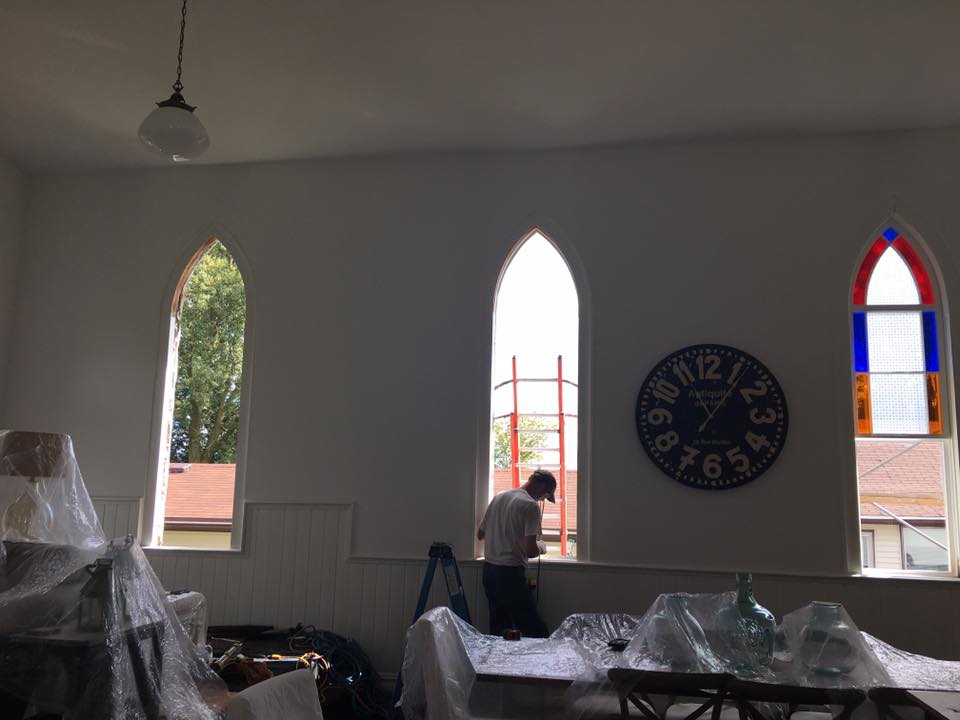
The install took many days and they took great care of containing the mess...not having replaced even a single window in any of our houses I had no idea how messy it could be...especially with 140 years of yuck that was trapped in the jams among other very yucky things....


I love seeing how carpenters work away and solve problems as they go..in this location our wall was out 1-2 inches at the top...

Prior to this installation we worked very hard to get as much of the painting of the trim work completed...it is so bright and airy in the house now...it is a new home...

              It felt like Christmas morning...the windows are stunning...it was so exciting to open up             windows...something you take for granted.


We were able to keep the stained glass above the front door as it has a thermal window on top of it...so it functions alright...

I am so grateful for these guys the carpenters that installed our amazing windows...they worked their butts off....in a bit of a heat wave...
Thank you Authentic Windows...
 We've come a long long way....
So far we've had to replace the driveway... the front door...and the windows just to name a few things...its been a crazy 10 months...to say the least.


Monday, October 30, 2017

my best DIY round up


I thought I would bump up some of my older DIY posts...I figured why not start with this one that cost very little but that has such a great result...How to build a fridge enclosure...
Click here for that post 

Here is the before...a standard not upgraded shallow cabinet above the fridge space....a $200 or more upgrade is a fridge enclosure...its a beautiful thing...but for $30-40 you can do this yourself...


How I paint cabinets....

For a durable easy to do water based cabinet paint tutorial...follow the links below


How to build a pine counter...I wanted a wood counter but after the dream kitchen reno's I needed to save money so I figured out how to make a solid pine counter for much less than a butcher block counter...click here for that how to


My best and most ambitious how to has to be the coffered ceiling


How to make a dutch door from a standard hollow door 


I really am passionate about DIY...I really like to try new things and challenge myself...and add new and origional touches to my homes....I think everyone can DIY from small craft projects to ambitious DIY projects... I think if you have decent tool skills and a good eye and love to work with your hands DIY is something to give a try..and if you don't know to build but you want to give it a try and give yourself permission to learn and to even make mistakes...mistakes are part of the learning process...if its your house give yourself the permission to try something new. 


Thursday, October 26, 2017

DIY cheap faux shiplap


In this post I am going to explain how I did this very popular project...SHIPLAP...I know it is been done everywhere and really popular and possibly trendy...but it is a simple trim detail that adds oodles of character to an otherwise bland wall...and it is or can be cheap... 

I used Hardboard...you can use 3/4" pine or 1/4" sanded plywood or the cheap stuff like I did... $8.90 a 4x8 sheet at the time of this post....I had the lumber store rip the sheets down to 6" strips so they were 6"by 8'
I then brought them home and sanded the edges and primed one flat side and the edges, after that dried I sanded them smooth again and painted each strip twice with a latex paint...I used flat but after installing I would suggest a satin finish, it looks so much better....I did a final coat in satin...

Because the hardboard is thin and my baseboards were thicker I was able to leave them in place...
The next part is important to get a great result...if your baseboard is the thin cheap builder kind...YOU MUST REMOVE IT NOW....just do it, leaving cheap builder baseboard in place and adding shiplap will result in a cheap look a very amateur looking job...and let's avoid that!

It is best to add a new baseboard on top of the shiplap to get a professional look...unless you have a thicker baseboard...I hope I have explained this properly....


So onto installation: you will want to find the studs in the wall where you want to install the shiplap...and mark the wall, this is where you will nail the strips to the wall....make sure to paint the wall white prior to installation of the strips...

Then using no more nails adhesive you will make sure to add a good amount along the back of the whole strip and using a level you will level your first run of shiplap...and nail it into the studs...this will hold it while the glue dries...make sure not to set your nail gun too deep as the nails will easily go straight through the material and you don't want the nails to go all the way through, just slightly counter sunk...I always use my RYOBI airstrike...it's the best, treat yourself to one if you are doing to do more than one DIY trim project you need a good nail gun and a cordless nail gun makes all these jobs so much better.

For my project my walls were not longer than 8' so I didn't have an seams but if you have a long wall stagger your joints...I used a miter saw to cut the strips to length...

As far as the spacing goes I used an coin from Aruba...it was square so it was very handy with the flat side... you can use a nickle, or you can use a scrap of the hardboard for a more accentuated gap line, it all looks great...for the corners I just did butt joints for a clean contemporary result but if you like you can add strips of wood on the corners but then you get into issue with the baseboard if you have outside corners...just keep in mind you never want your applied trim or woodwork to jut out more then the baseboard, it is just wrong...I added adhesive to the butt joint to keep them together.


 The last step is to add the baseboard if you removed what was there then it's time to fill the holes... and imperfections with a spackle and sand smooth...you can use a flash light to shine light on your wall before you paint because spackle dries white and when you miss one nail hole then paint it is really hard to get that smooth again...and it looks crappy if you paint over a bit of smeared spackle....
last step is a good coat or two of latex paint...I applied the paint with a small roller.


This is really a simple project and if you are thinking about doing it I would say you have nothing to lose...you will love it.